There are two installation methods for self-tapping thread insert.
Self-tapping thread insert set installation method one: when the installation of a small number of times, you can take a simple installation method, specifically to take the corresponding specifications of the bolt + nut method, as shown in the figure below, the self-tapping thread insert fixed in the corresponding type of screws, with the same type of nut for fixing, so that the three become an integral whole, with a wrench to screw the screw set into the bottom hole, and after the screws can be withdrawn.
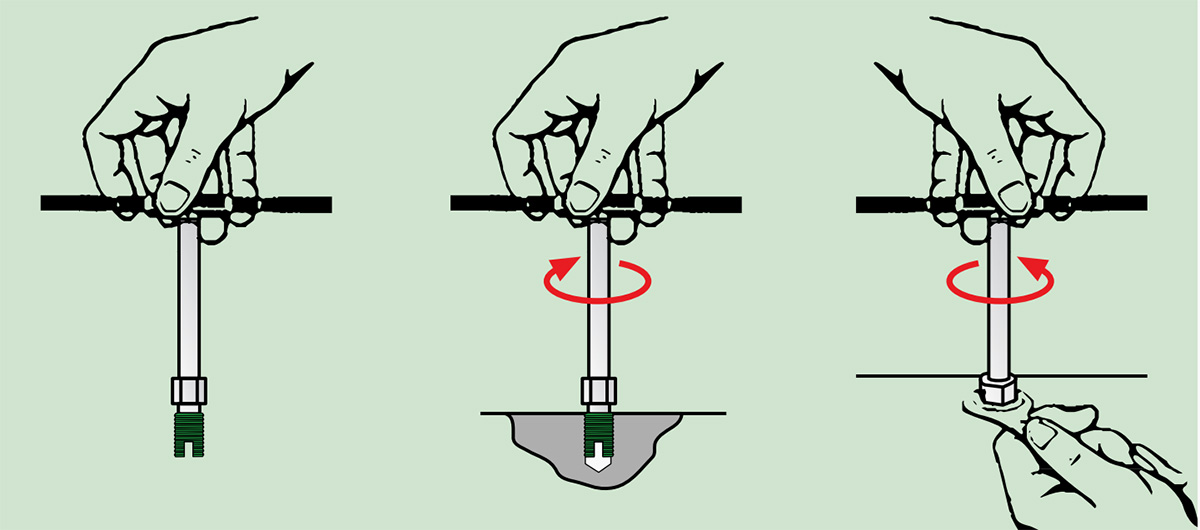
Self-tapping thread insert installation method two: when the installation of a larger number of times, the use of special Self tapping thread insert installation tool, the specific methods of operation refer to the following chart. The end of the tool in the picture is a hexagonal head, can be connected to the manual tapping wrench, can also be connected to electric or pneumatic tools.
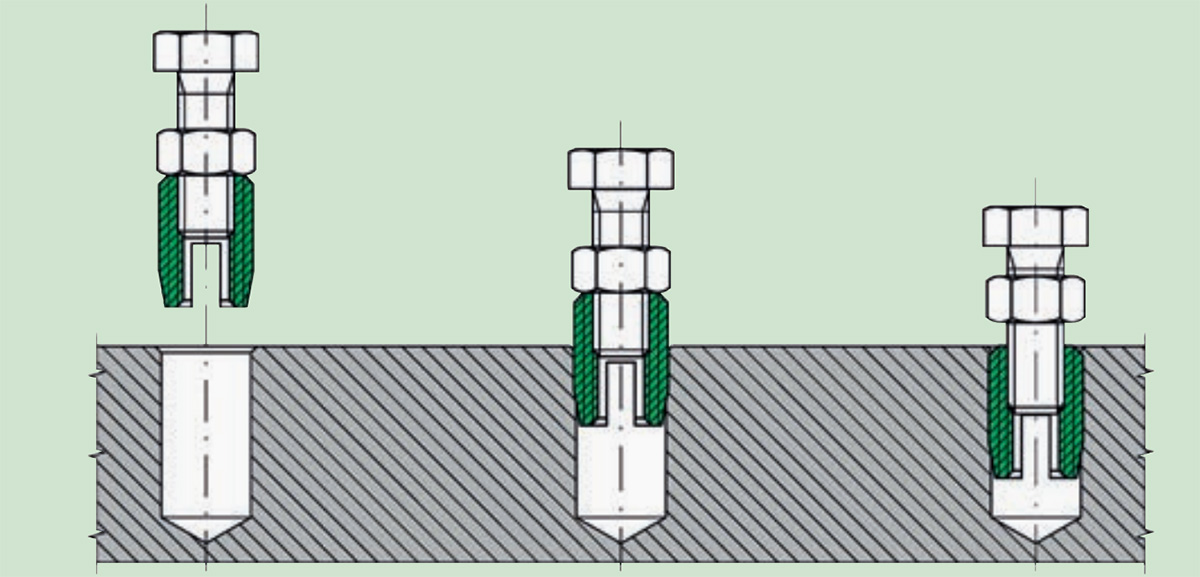
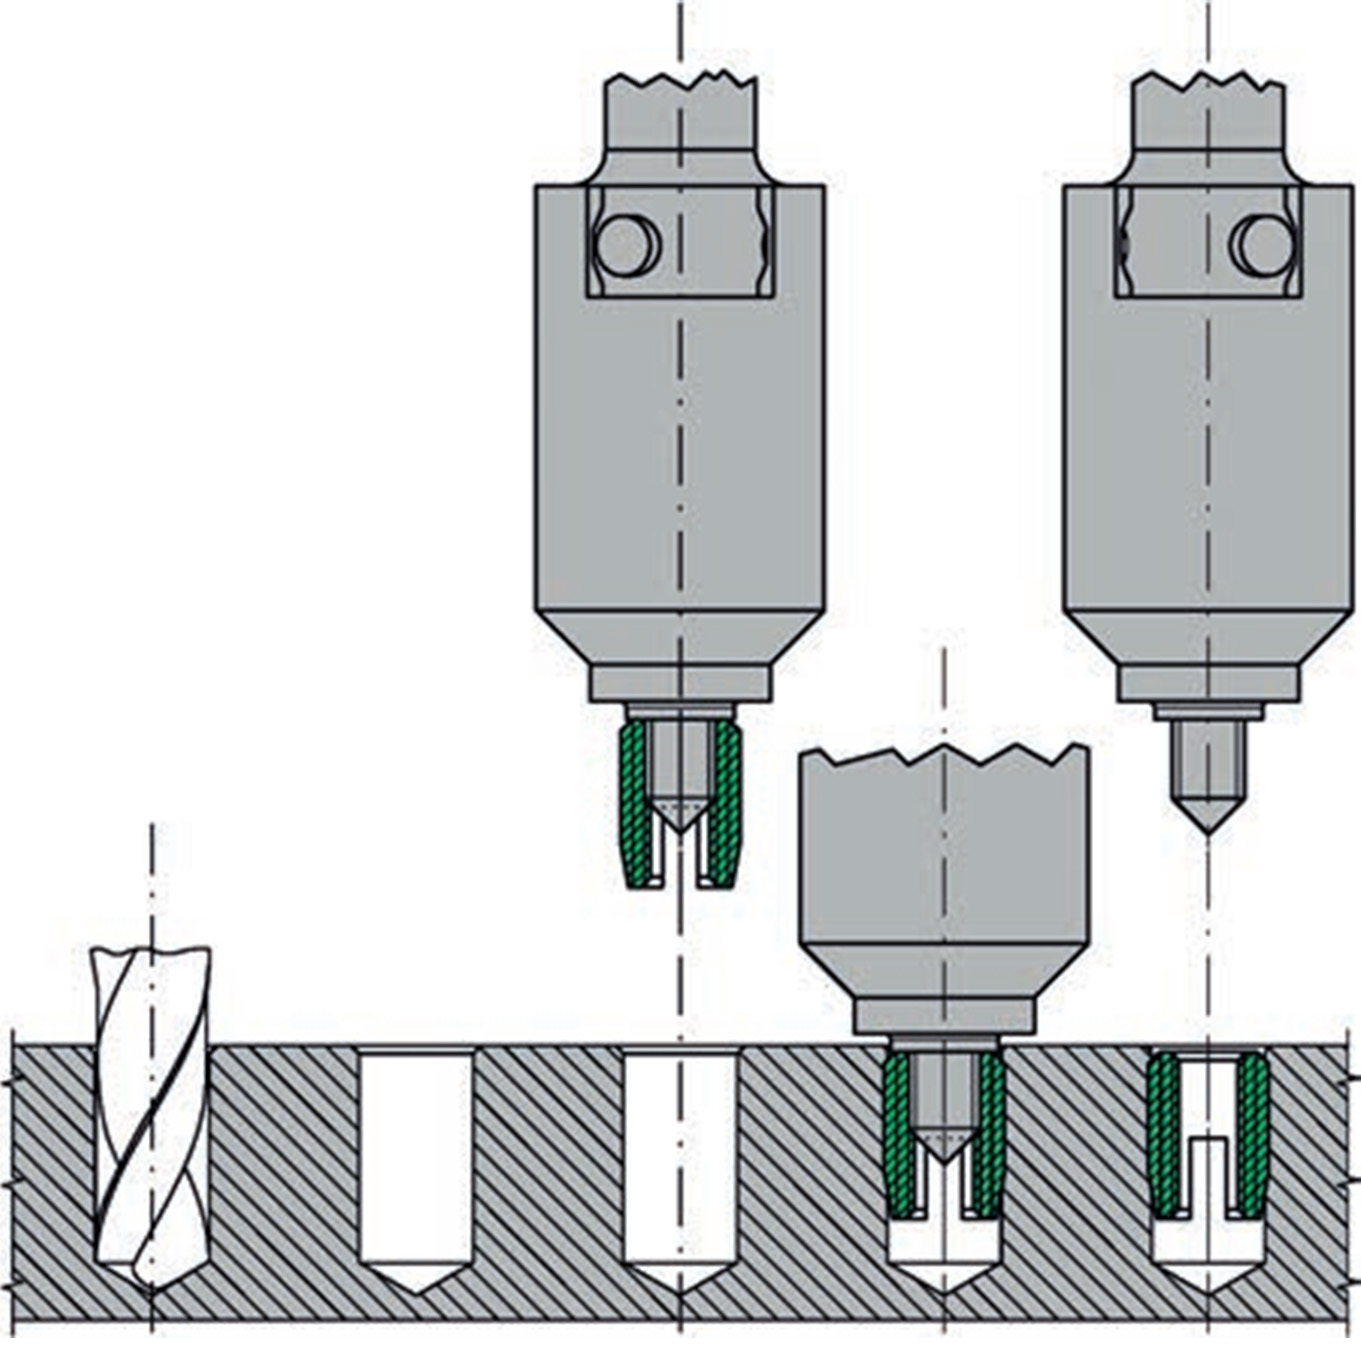
Self-tapping thread insert installation considerations
1. For different processing materials, refer to the drilling size specifications, pre-drilling processing. When the hardness of the corresponding material is high, please slightly enlarge the bottom hole within the drilling range.
2. Fully install the self-tapping thread insert into the front of the tool with the slotted end downward, and it should contact the workpiece vertically. When installing (1~2 pitches), make sure that it is aligned with the bottom hole, and do not tilt it. If tilting is detected, do not reverse the tool and readjust before using. After 1/3~1/2 of the way in, do not start again. In addition, do not rotate the tool in the reverse direction as this may cause product failure.
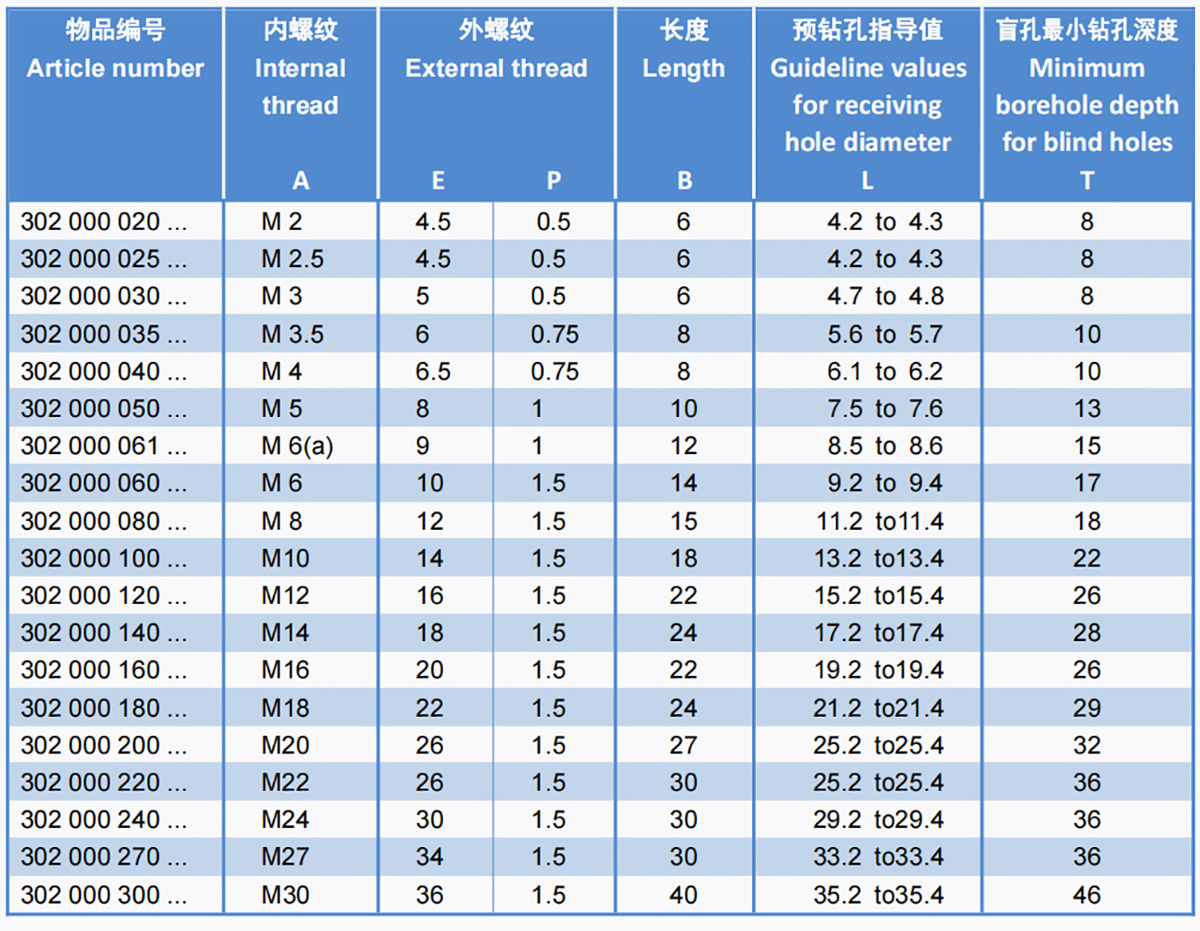
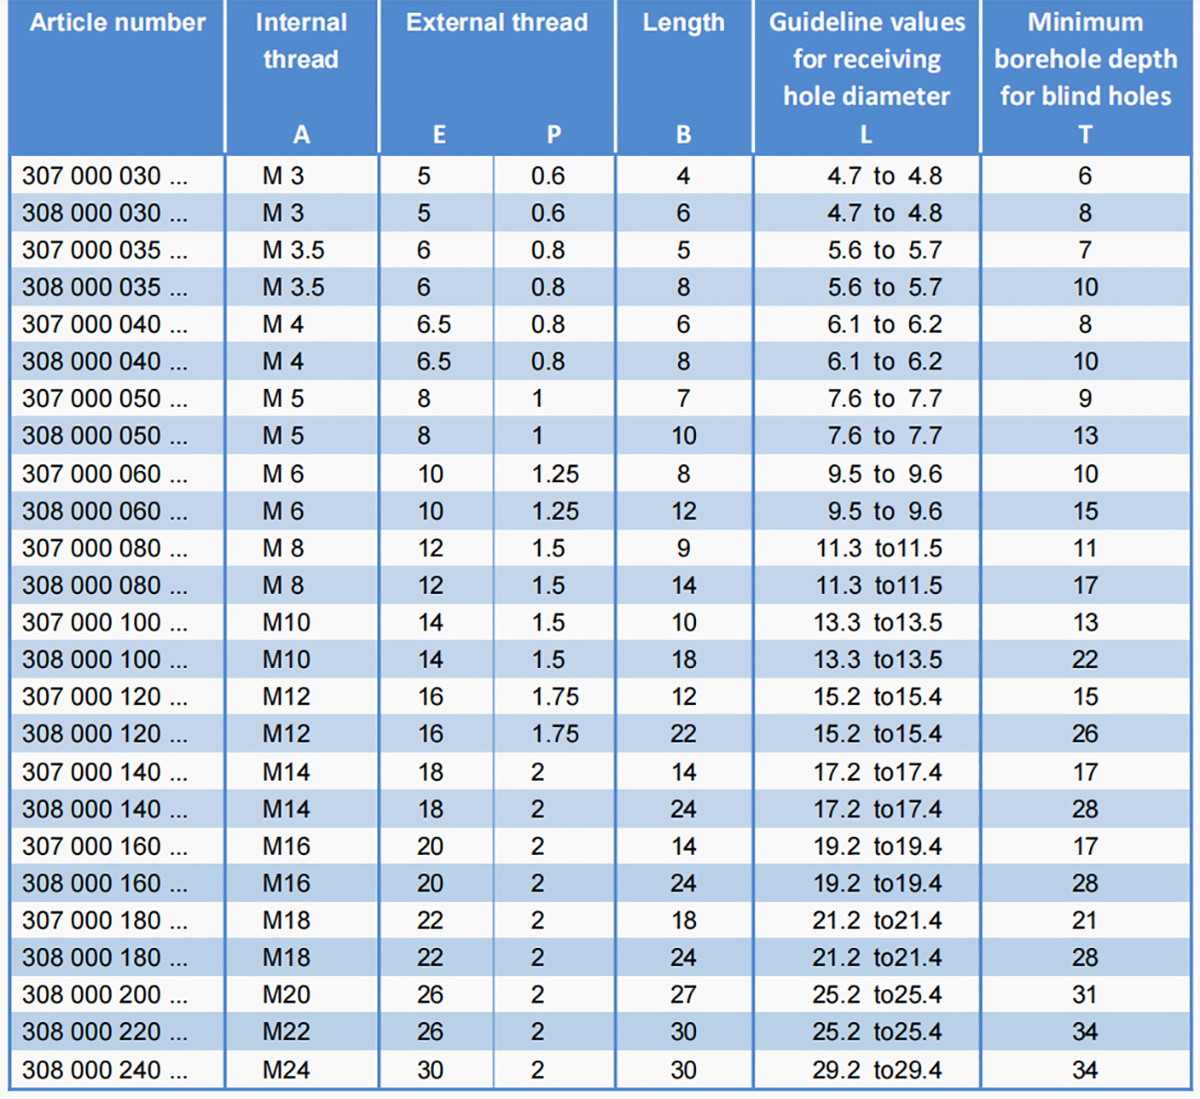
Self-tapping thread insert specifications and drilling size
The following is a list of metric sizes of self-tapping thread insert and the drill size needed to install them.